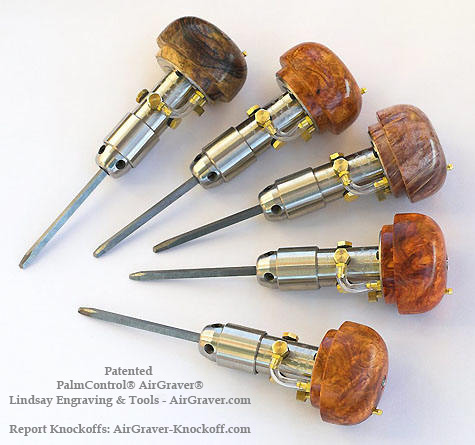
Just a few words on flicking with the Lindsay PalmControl.
The Palm Control is just like engraving with a traditional palm push graver only you don't have to push as hard. It goes when we push and stops when we stop. To flick, just pick up the point at the end of the cut with a snap. If we first point a graver at a steeper angle and push rather than snap out, it will go forward. Pointing the graver steeper and pushing before flicking is not the way to flick as it is hard on the points and we are taking a chance of breaking a point off.
The PalmControl™ is instantaneous with its response time and can stop dead and break the chip out with a quick snap at the end of the cut. We can lay down a dozen short bursts of lines just as fast as we can with a non-power tool.
The PalmControl™ is like a palm push graver but in essence it is giving us huge muscles in our arm. Just give a quick snap at the end of the cut to flick and don't think you are going to get extra leverage by first pointing the tool deeper. Pointing deeper first is similar to the car drivers we see that take a left turn by first going right before going left. It doesn't help to go the opposite direction first, but only takes more time. I have been flicking chips at the ends of cuts since I started engraving in 1973 in my father's jewelry shop and have not changed my technique since I started using the Palmcontrol™ in 2002. Well, other than my foot doesn't go up and down anymore. There are videos of PalmControl™ engraving with a lot of flicking at this link..
http://www.engravingschool.com/private/videos.htm There is also information about the good reasons to flick in this thread:
http://www.engravingforum.com/showthread.php?t=886
Flexible gravers and flicking
There is an old method before pneumatic tools to flick using flexible or springy graver shanks. This was at a time before high speed steel, cobalt and carbide was used or even invented. At that time gravers were made from carbon steel such as is used in band saw blades. It wasn't unusual for engravers to make their gravers from worn out carbon steel saw blades. The graver shank was thinned so that it would flex like a spring. To flick with this the engraver would come to the end of the cut, stop, point the graver steeper and load the graver shank up so that it was flexing and ready to spring. Now when the point was picked up, the graver shank would make an audible 'ting' as the loaded up spring shank snapped the chip out. This method used to be used for small English scroll with non power gravers. The engraver Simon Lytton from England who is well known for his English scroll engraved this way without power, however he now is using a PalmControl™ with carbalt gravers. Engravers could get a way with this using carbon steel graver points because they are less hard and brittle than modern day graver steels. If this technique is used with carbide or carbalt the point would break off in no time. I am not an advocate for thin shanked gravers because they do not work well with pneumatic tools. The shank will flex and vibrate from the fast pneumatic impacts and we loose impact power efficiency. Thick shanked gravers that are ridged will cut much cleaner and easier with a pneumatic tool. Here is info about this and thinning gravers shanks
http://www.engravingschool.com/priva...%20gravers.htm
Again, the PalmControl™ is just like a traditional palm push graver, only we don't have to push as hard.
Related information:
PalmControl push resistance settings
Thanks, Steve


 Graver Video Conferencing is empty Join now!


