
 |
The Internet's Largest and Fastest Growing Engraving Community
Discuss hand engraving using basic to the most advanced methods and equipment
Forum Members: 14,762. Welcome to our newest member, Katherine
EngravingForum.com -
Domain since Feb 7, 2003
 Graver Video Conferencing is empty Join now!
|
|||||||
| ENGRAVING TOOLS - Paypal accepted | Classes | Glossary | Feedback | Tips | Sharpening | Bulino | Videos | Forum Policies |
 |
|
|
Thread Tools |
|
#1
|
|||
|
|||
|
(If you would like to comment on this submission, you may do so by posting a reply in this thread. Thanks! Kaitlin)
Well I love a challenge. I will be engraving a Keighoff K-20. Today is July 4,2008 7:35 PM. I have posted a photo of it. The client has requested an engraving of something along the lines of Gianfranco Pedersoli. Oh yummie, one of my favorite Italians. So to all the folks that have a time problem I can tell you no one has a bigger problem with deadlines than I do. So to help with the problem of, GIT ER DUN! I will engrave this K-20 and finish it by Aug 15 2008. Time is an abstract concept. If you think it will take forever, it will. How do you eat an elephant? One bite at at time. I am going to use Steve's Classic Airgraver with foot control exclusivly. This will be a full coverage engraving. The pattern will have grotesque faces, figures, nudes, vines, flowers, dragons, and whatever else looks good at the time. I have started with welded up the opening lever to get rid of the stamped checkering. It will be fillagreed with some thing yet to be determined. the receiver and accompaning part are not yet polished. Remember to use Brownell's HEAT STOP when welding on any gun or parts it works, it will keep the spots you want to stay cool from getting too much heat on them. Second order of buisness, polish the metal to 400 grit finish, if you like shinney you can hit it with some 1500 or 2000 grit just to make scratches stand out  I will not post any pre-design drawings they will be executed directly upon the metal to be engraved, and can by seen in the pics. Frank Hendricks once told me that, "drawing on paper and scribing a pattern on the metal is a waste of time." I agree with the drawing on paper part, Why? Because it take as much time to draw it on paper as it does to draw it on the peice to be engraved. This is qualified by, Is the client paying for the drawing? If so fine, if not your loosing time and $'s. I don't agree with not scribing the design. For two reasons one it gives you a chance to correct your design, the second is, I'm sloppy and I will rub off the design to the point where I have to re-draw the pattern. I encourage, questions, comments, heckeling, (at your own risk), I will try to post picts, and a running or rambling decription of what is happening. One more thing I am typing as fast as I can, there will be spel;ping errrrorrrs.I am not going to spell check any texst. My computater is barley funck tional.:willy_nilly: Kurt Horvath www.kguns.com 931-625-3893 Happy 4th. of JULY 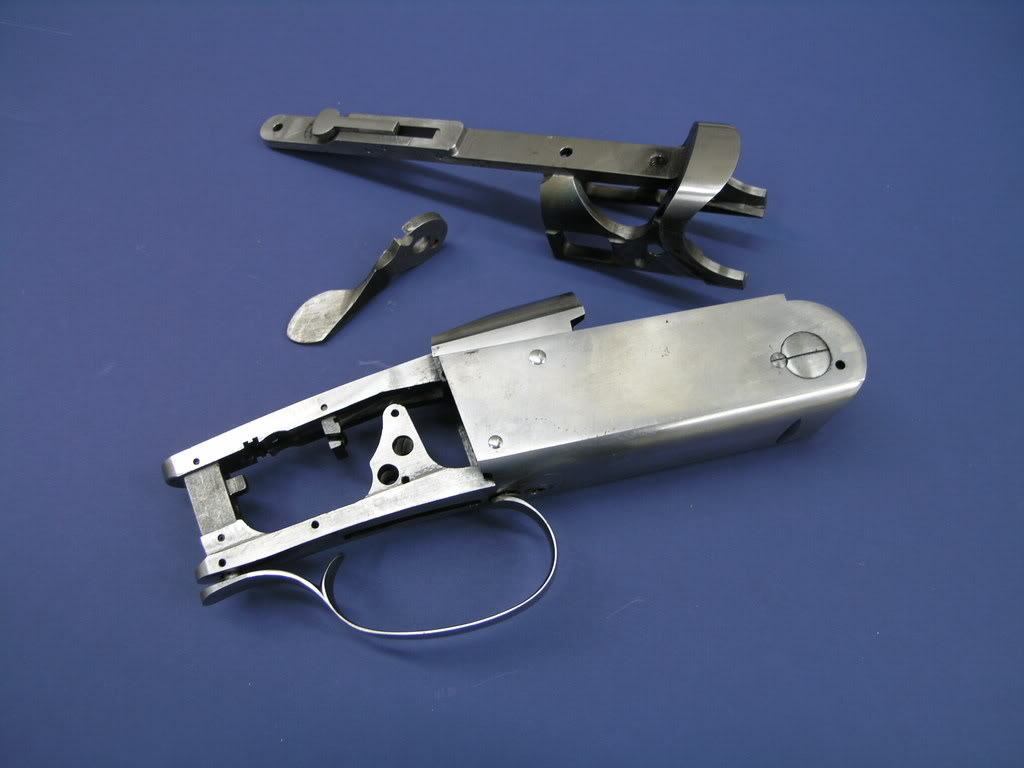
__________________
Kurt Horvath |
|
#2
|
|||
|
|||
|
Day 1, 5:43pm
K-20 Polished to 400 grit then, hit with 2000 grit just to brighten things up. You can see the reflection of the Airgraver on the bottom of the receiver. After Dinner I'll start the layout. There are many ways to layout a design on metal. My preferance is to use modeling clay and blackboard chalk. It's very simple and effective, but fragile in scence that it your not careful you can rub it off. That's one reason why you scribe your design in so you don't loose your work. [IMG] 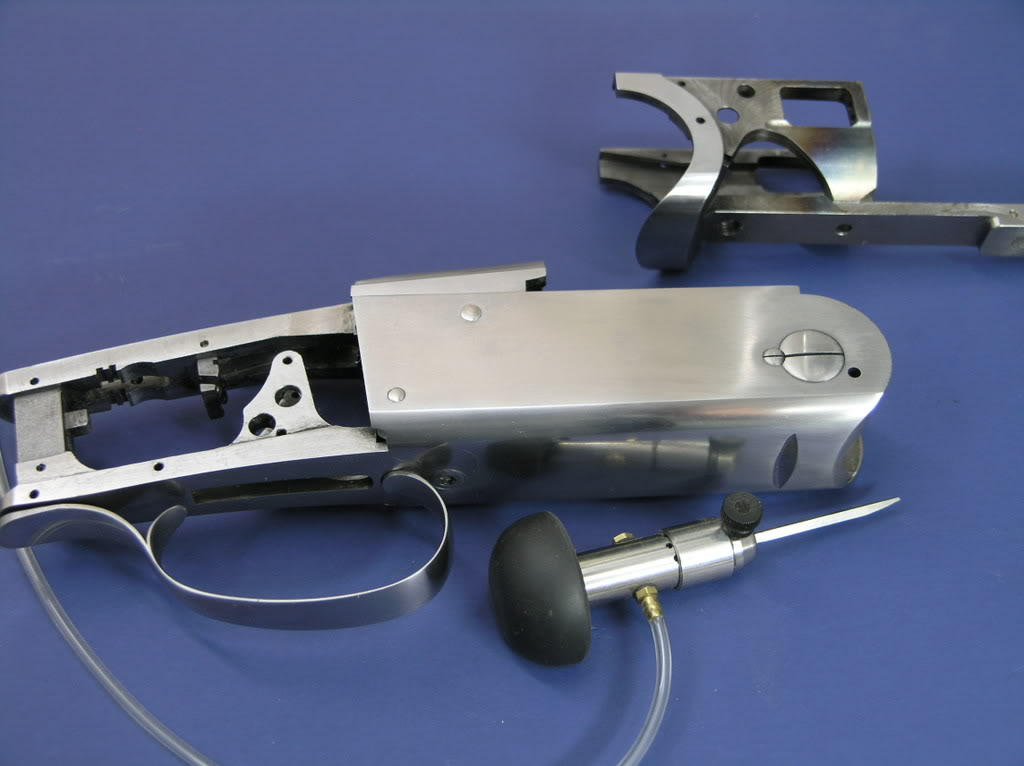 [/IMG] [/IMG]
__________________
Kurt Horvath |
|
#3
|
|||
|
|||
|
Day 2 July 6 11:06am
Thermo-Lok placed into the receiver to hold the forearm on the receiver for layout and engraving. Hot glue works just as well, but it's a little harder to do and the heat need to make it work is higher. If your going to work on the same type of gun a fixture is the best solution. You can mount and dismount the forend iron from the receiver as easily as you would a normal shotgun, and you have consistant placement of the two parts. 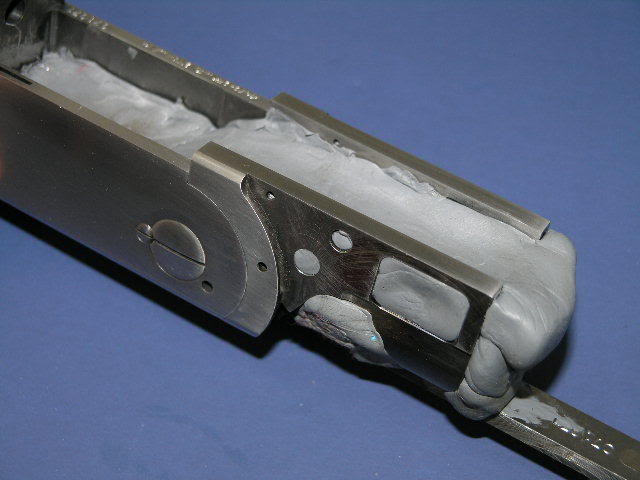
__________________
Kurt Horvath |
|
#4
|
|||
|
|||
|
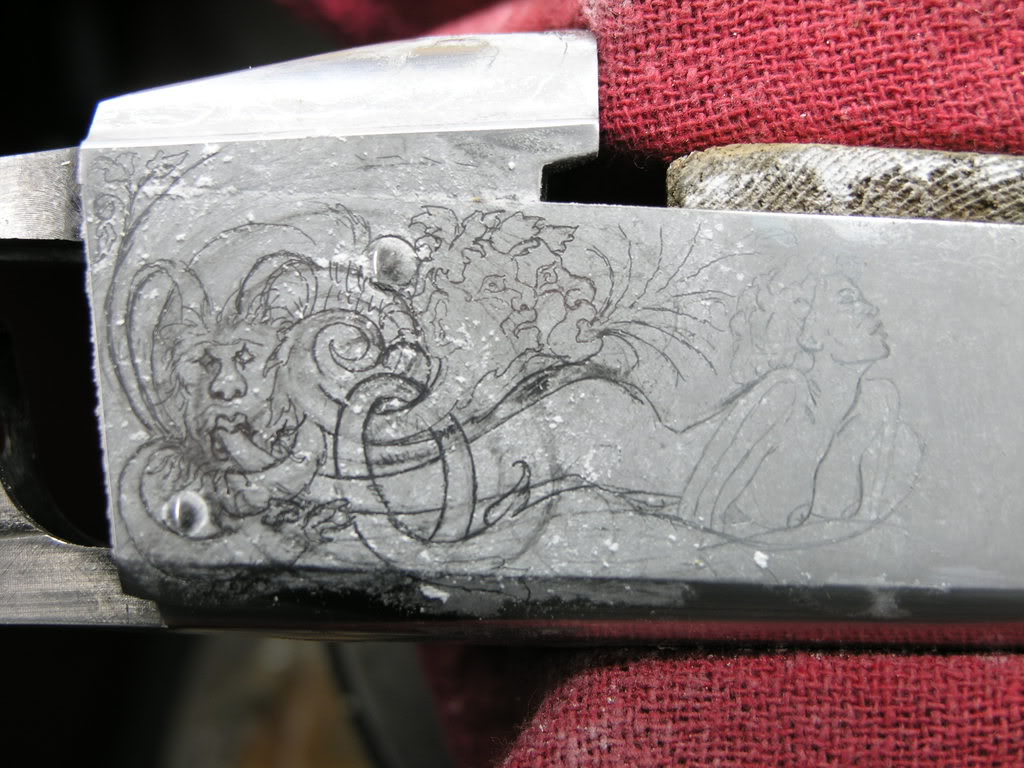
Starting the layout
__________________
Kurt Horvath |
|
#5
|
|||
|
|||
|
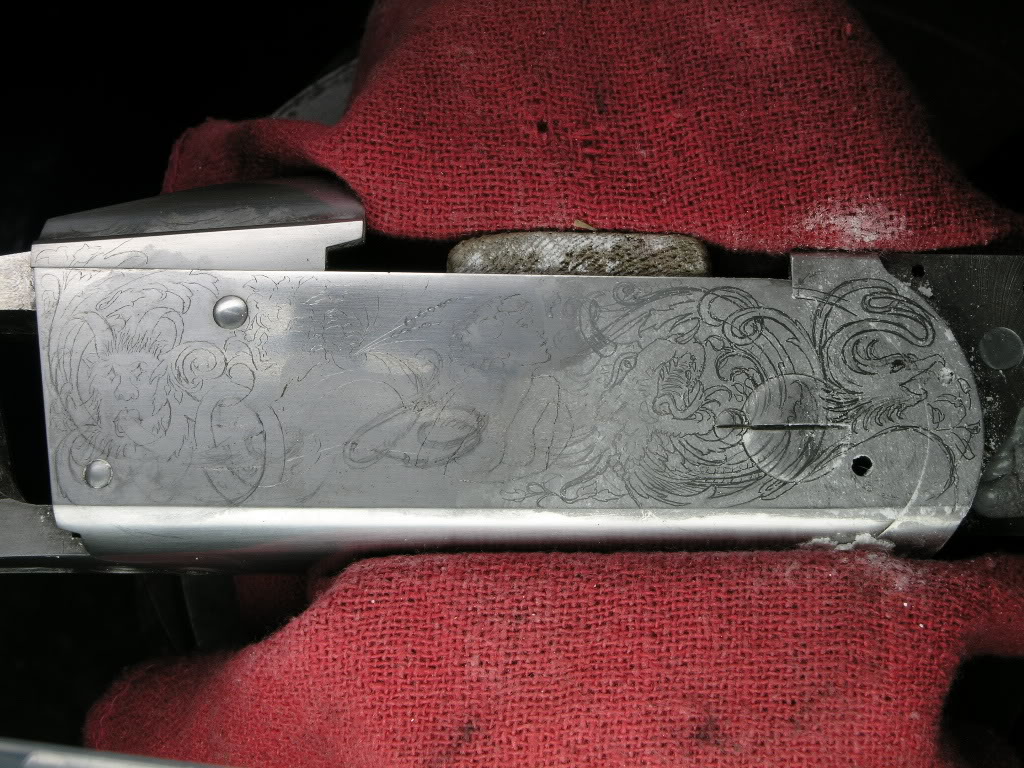
Second day of layout. the left side has been scribed the right side is in chaulk and pencil.
__________________
Kurt Horvath |
|
#6
|
|||
|
|||
|
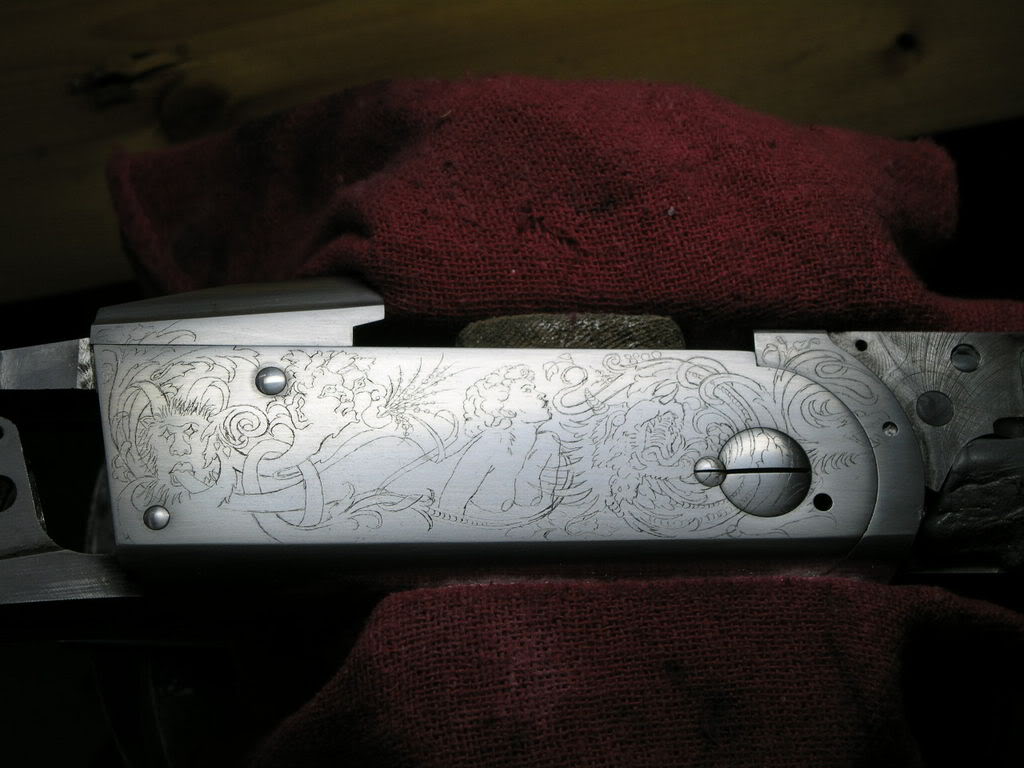
Day3 of layout. I didn't get much time on it today. The pattern is mostly finished on the right side of the receiver, and scribed into the metal.
__________________
Kurt Horvath |
|
#7
|
|||
|
|||
|
Sat. July 12
This is a rough layout made from a transfer from the the right side scroll with the main subject added. You will note that the area circled in black is oil leachching onto the the clay and chaulk surface. You can't let this get past you if you for example if you did the layout at night and waited till morning to scribe the pattern it will not be there it will bleach out so to speak. This will occure at any place that two pieces of metal meet, hinge pins, screw holes, etc. You should degrease the piece befor layout, this will stop the leaching. I use transfer paper from Tandy Leather Co. it's used for transfers in leather working. it tough flexible and it's the best I've found.  The second photo is the pattern corrected and enhanced. 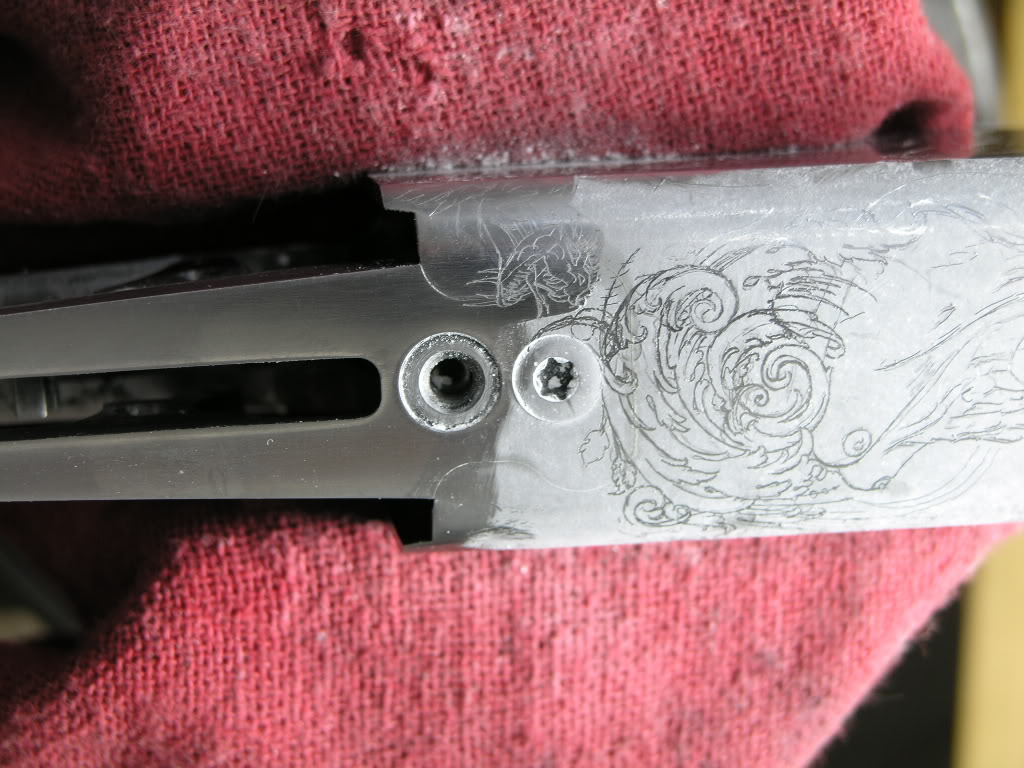 The third photo is scribed and again corrected. When you laypout in this fashion you have several chances to correct your design 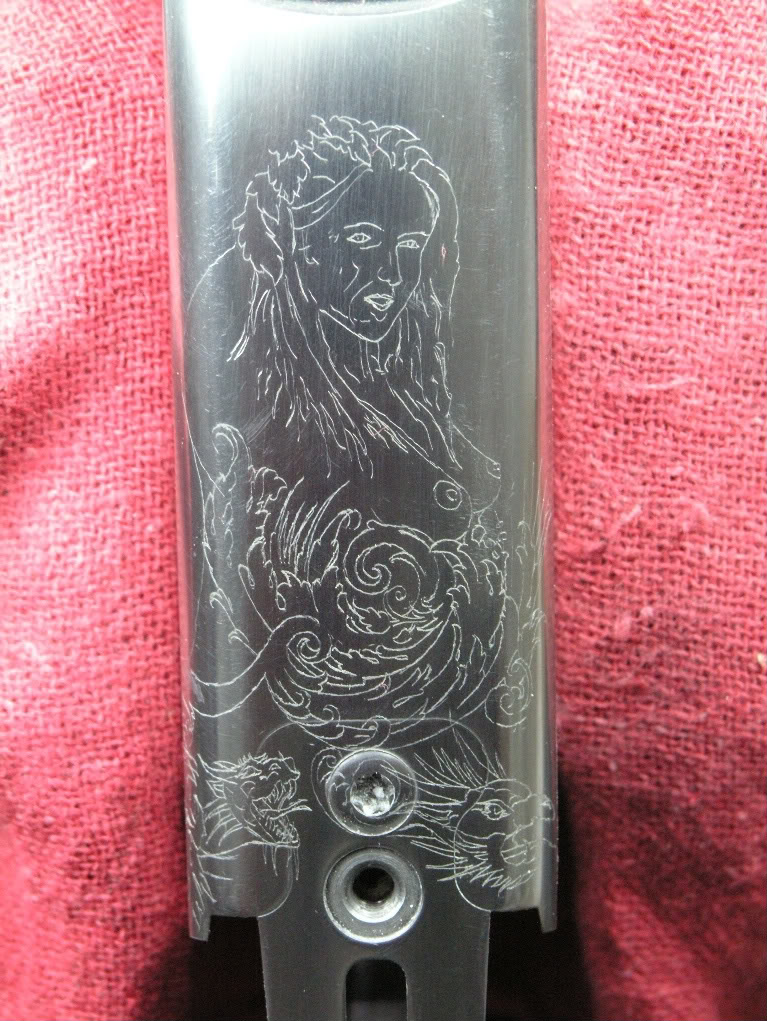 The fourth photo is a shot of the side and the bottom of the receiver. The pattern works it's way around the sides to the bottom. The scroll flows from one side to the bottom. 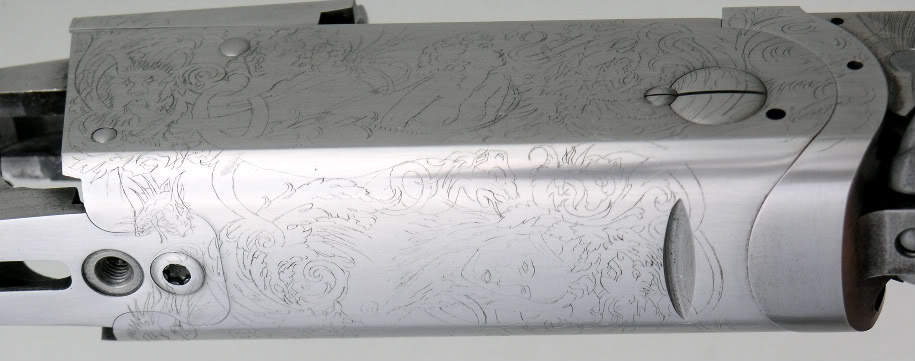
__________________
Kurt Horvath |
|
#8
|
|||
|
|||
|
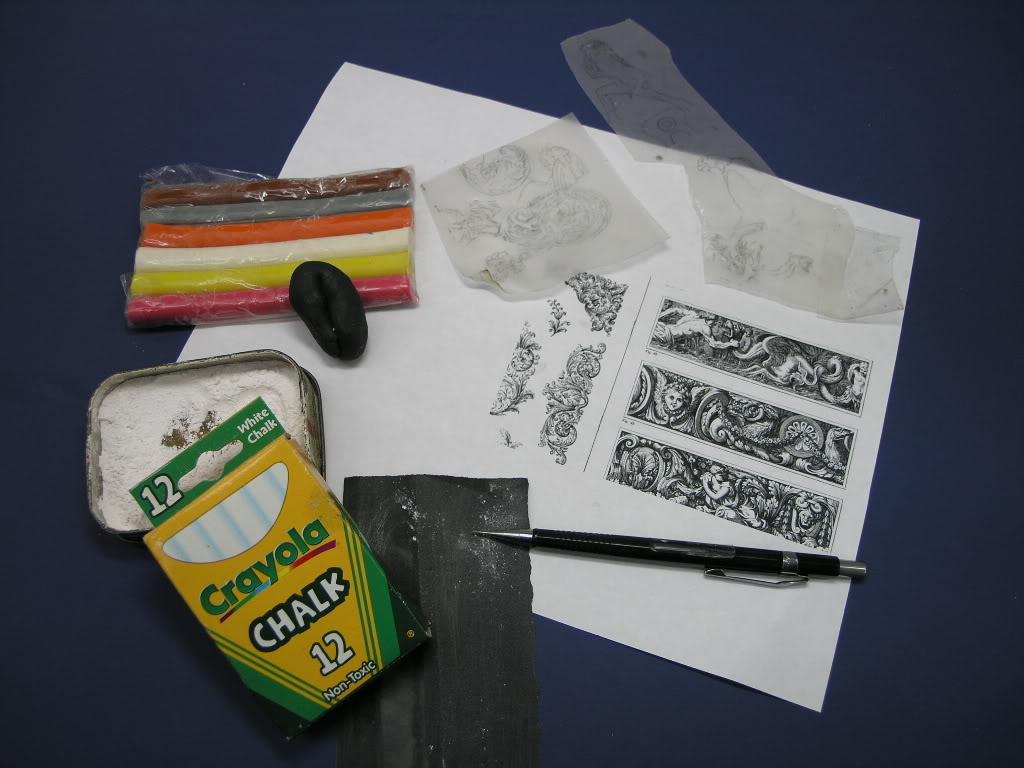
Here's a photo of the essentials for a layout. Clay from Walmart. Blackboard Chalk. This will last for years, Take piece and rub it on a coarse file into a little tin container to make a fine powder. Just dab your finger in it and dab on to the metal, after rolling the clay over the surface you want to draw on. The clay leaves a slightly greesy surface that the chalk sticks to. A good mechanical pencil, I like Pentel 0.05 some fine sandpaper to sharpen the lead. Transfer paper from Tandy Leather Co. and your model to work from.
__________________
Kurt Horvath |
 |
| Bookmarks |
|
|