
 |
The Internet's Largest and Fastest Growing Engraving Community
Discuss hand engraving using basic to the most advanced methods and equipment
Forum Members: 14,762. Welcome to our newest member, Katherine
EngravingForum.com -
Domain since Feb 7, 2003
 Graver Video Conferencing is empty Join now!
|
|||||||
| ENGRAVING TOOLS - Paypal accepted | Classes | Glossary | Feedback | Tips | Sharpening | Bulino | Videos | Forum Policies |
 |
|
|
Thread Tools |
|
#1
|
||||
|
||||
|
A friend of mine owns a Steven's rifle with some nice engraving. He asked me about the border. The outer portion looks simply like a perimeter line with evenly spaced nicks, but the inner accent line... how is this done? I can't tell if the interrupted cut was made parallel to the outer border, with the graver rolled slightly in the middle of each cut, or if these too are scallops (smaller) "popped" out.
Does this type of border have a semi-official name? And can you guys confirm how that inner accent line was made? Thanks! 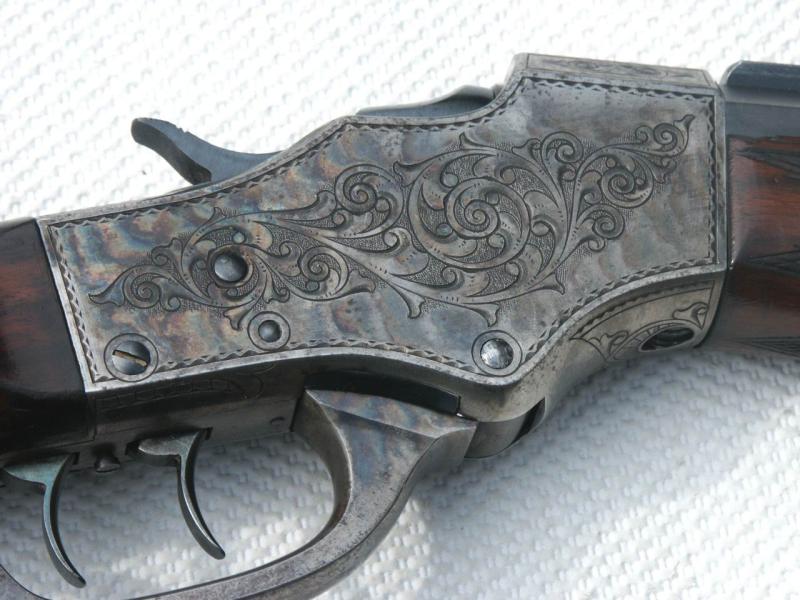
__________________
Kurt |
|
#2
|
||||
|
||||
|
Hi Kurt,
I would call This a version of the "nick and dot" border. I would cut that border in the following way. Engrave a single line border. go back with the flat graver and make the chip cuts. Cut smaller chip cuts, spaced apart, to form the inner line. I make the chips cuts with a flat graver, setting one point/edge on the line. I tap a few times, raising the angle up, the tap a few more times, bringing the graver down to a shallow angle very quickly, then bringing it out of the metal. HTH Tom |
|
#3
|
|||
|
|||
|
Kurt -
The "semi-official" name of this cut is a "nick and dot" border. It is a very old style border, going back a couple hundred years or more. There is a very good tutorial on the "nick and dot" in one of Lynton McKenzie's engraving tapes. Typically, the larger "nick" (the triangular cut on the outside line of the border) is cut with a fairly wide flat graver, maybe a #38 or 40, which is leaned over so that the side of the flat follows the outer border line. It is then driven straight in toward the apex of the triangle, and rolled out of the cut along the border line. The smaller "dot" (the smaller triangular cut) is typically cut with a square graver, laid over on it's side , and driven in and scooped out in a shorter distance. Different engravers produce different shaped dots, some of them are more oval than triangular. There should be no inner line to the border, unless the engraver scribed a line to get his dots in alignment. This is much easier to do than to describe. Incidentally, the border on your friend's Stevens is one of the better ones I have seen. Bill |
|
#4
|
||||
|
||||
|
Here is a quick demo of cutting this with a Lindsay Patent point on a palm control.
I scribed two lines parallel to the edge. Then I cut the one next to the edge. Then the length is bisected, which is easy to eyeball. Then bisected again. and again. Then the Nicks are cut. Then the dots.  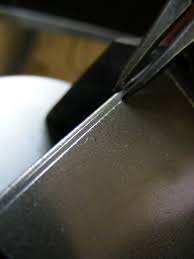 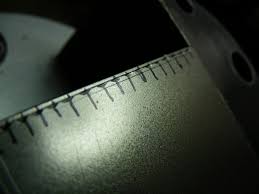 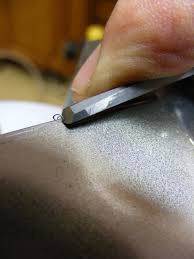 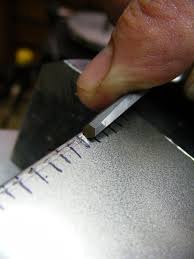 
__________________
Barry Lee Hands www.barryleehands.com "Critics gather, they discuss aesthetics, Artists gather, they discuss turpentine. . ."- Pablo Picasso |
|
#5
|
||||
|
||||
|
:whoo: Wow, this is great. Thank you especially Barry for the demo... so much easier to understand when put into pictures like that. I initially thought that the major nicks were cut perpendicular to the line, but looking at it a bit more, the cuts are too wide, so I figured the cutting had to take place parallel to the line, by rolling. It would seem the challenge with this border would be to keep the cuts consistent in width, length, and depth.
Excellent stuff. Again, thank you for taking the time to post that sequence. Now I need to give it a try with some practice plates.
__________________
Kurt |
|
#6
|
||||
|
||||
|
Thanks Barry for the demo. The layout is simple and easy to do. It is allways easier once you see it rather than trying to figure it out yourself.
Neil:yesnod: |
 |
| Bookmarks |
|
|