
 |
The Internet's Largest and Fastest Growing Engraving Community
Discuss hand engraving using basic to the most advanced methods and equipment
Forum Members: 14,762. Welcome to our newest member, Katherine
EngravingForum.com -
Domain since Feb 7, 2003
 Graver Video Conferencing is empty Join now!
|
|||||||
| ENGRAVING TOOLS - Paypal accepted | Classes | Glossary | Feedback | Tips | Sharpening | Bulino | Videos | Forum Policies |
 |
|
|
Thread Tools |
|
#1
|
|||
|
|||
|
(If you would like to comment on this submission, you may do so by posting a reply in this thread. Thanks! Kaitlin)
Ok folks, it's gotta start somewhere. Don't know if we have all the rules figured out yet, so right or wrong here I go. This is my first submission for the latest contest put forth by Steve Lindsay. Thanks a bunch Steve for the opprotunity you provide and for your generosity. Sitting out on the porch this morning with my coffee and a nice cigar, I started some sketches of some ideas I've had of designing a buckle. My plan at this point is to make this in sterling silver. Haven't thought about dimensions yet. 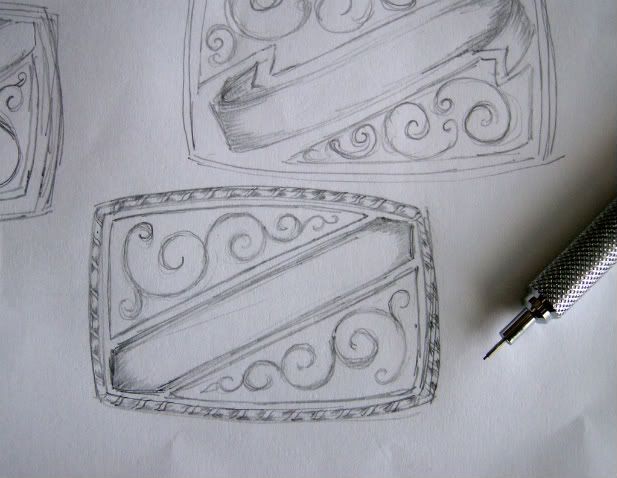 This is a preliminary sketch (the one that my pencil is pointing at) of my first submission. I will next work on refining this sketch and adding some more detail, but this is my start (just an idea on paper at this point). There are some areas I'm not sure how I want to treat at this point. For instance, will my design elements be separated by lines or do I want to make each of the 3 main elements a separate raised surface by soldering 3 panels onto a substructure, hmmmmmm? Will the center diagonal panel include another engraved design or will I attempt some lettering???? There are a lot of little details to this project I haven't worked on yet but must be dealt with before I start on the silver piece. Also at this point, I am thinking of transfering my final design for this onto a steel practice plate and working out any problems that might arise engraving and designwise before doing this on silver. If I were more experienced and more confident of my skills, this step would be unneccessary. That's it at this point, won't get much more done this weekend I don't think, gotta celebrate the 4th. Wishing everyone a great 4th of July, God bless America, Gene |
|
#2
|
|||
|
|||
|
Last night I worked on my drawing some. Wanting to see some of the contrasts and a better idea of how the design will look on metal. I dakened the background and drew in a some shading lines then duplicated and rotated the image to give me the two images of the buckle design. Did some erasing here and there and consequently got some smudges in areas. There are some areas that still need work but I can address those when I redraw to create the actual design to be transfered. At that point I won't be reproducing the detail shown here and I will be able to focus on correcting the flats, elbows,etc.
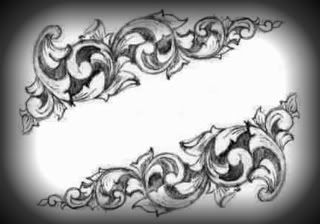 With a little imagination, the shaded outer perimeter of the posting gives some idea of what the design will look like on the slightly domed metal surface (allthough a silghtly different shape). Still haven't worked on the center panel, but that will probably come late this evening. Gene |
|
#3
|
|||
|
|||
|
I've had time to work on my project some today. I started by cleaning the design a little. What I did was I printed a very, very faint copy of my original design. It was very faint and could barely see it but there was enough there that I could make out all the outlines. By printing it out like this I was able to then draw over it with a pencil and correct any parts I felt needed correction. Because the print is so faint only the pencil drawing over it shows.
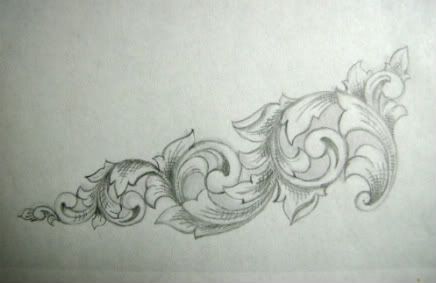 I then placed a sheet of tracing paper over that drawing and traced only what I think will be the main cuts for my design. If I have success transfering this image then that is all the drawing I will need for these 2 elements of my design. All the rest of the details (mainly shading cuts) can be done right on the metal. I'm saving all my drawings to use for reference when cutting the detail work, shading etc. Unless I have to redo something, that should be the end of the drawing for a while. 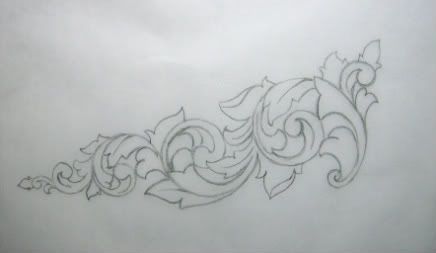 Focusing now on the metal for a while, my ultimate goal is to do this in sterling silver and had thought of practicing the design on a mild steel plate. But now my thinking is that if I do this on mild steel plate, it will be a flat plate that I will be practicing on and I won't be getting the feel of cutting on the the domed silver buckle. Soooooo, I've decided to make a buckle out of nickel silver and let that be my practice plate. I'll do a completed buckle just like I would in sterling. If it works out well, then I will go onto my next project or submission and come back to do a sterling buckle if time permits after my next submission. If the nickel one does not turn out then I will proceed with the sterling. I've heard some people say that nickel can pose problems. We'll soon see. I know this is not a tutorial on silversmithing, but thought I would touch on some points of how I will make the buckle and get it ready to engrave on. Hopefully some will find this interesting. This is the sheet of 14 guage nickel. Not sure if nickel sheet can be purchased in any thicker guage (I just checked this weekend and it is available in 10 and 12 guage). This stuff is pretty stout and is a good weight for a buckle of this size. 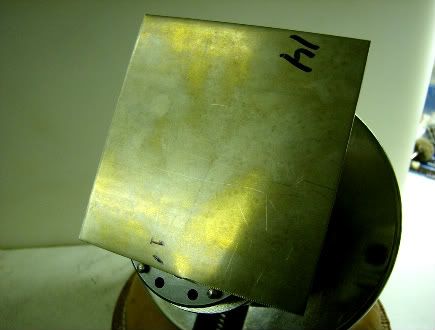 I made a paper cutout of the size and shape I wanted and traced around it in preparation for cutting. Dimensions are, 2 1/4 x 3 1/4 inches at the widest points. 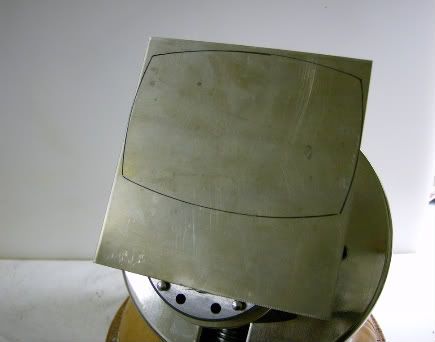 This is the buckle blank just cut. I used a large pair of metal shears to make the cut. I get straighter lines this way on this heavy stuff than if I had used a saw. Shear marks on the back side will be filed and polished away eventually. Also at this time I used my maker's stamp on the back side. 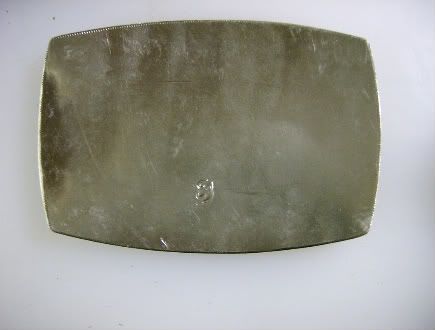 I've decided to sand the front surface smooth (down to 1500 grit) and do the border cuts before I dome the metal. I think that it will be easier for me to make those long straight cuts on a piece of flat stock and the soft wooden block that I use for doming shouldn't hurt the cuts later. The border cuts will be used later as part of the rope pattern as seen on my drawing. 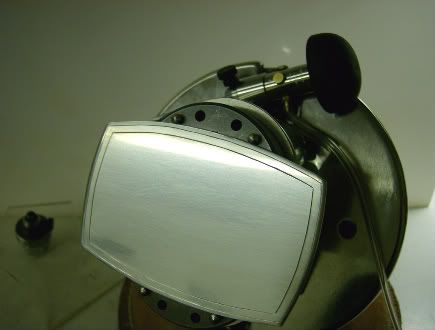 This is a view of the back side just after having been cut from the blank. Here I'm just checking the placement of the buckle/belt hinge to be soldered at a later step. Sorry about the slight blur in the photo. 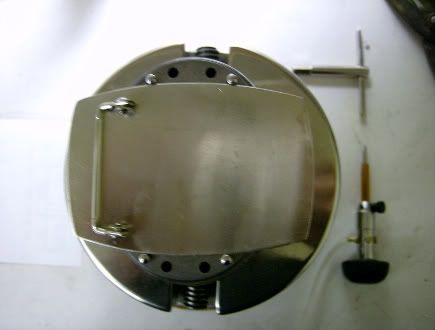 Now I begin doming the blank. I use this trusted wood block and wooden mallet I've had for years to do a lot of my doming on. Each side of my block has a different size depression to accomodate different sized pieces. I have an old wooden stump and a big block of plumber's lead that I use at times also for the same purposes. Many times these old wood or lead forms work best to shape silver on if used with wooden or rawhide mallets and are not so apt to work harden your metal blanks as opposed to using dapping dies and metal forming stakes, IMHO. I don't have much experience with nickel silver but I think it probably work hardens quicker than sterling. I think that the concern over work hardening is only relevent to engraving in this case though. 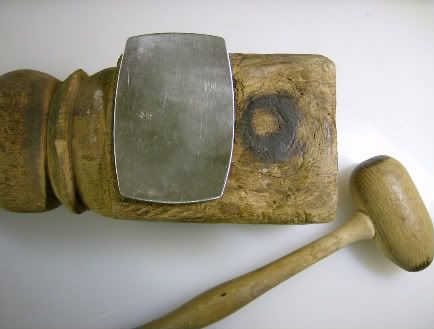 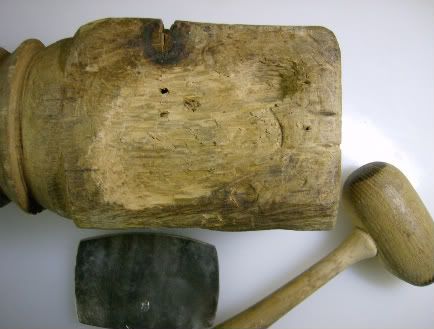 This is a view of the buckle blank showing the dome established and pretty much done as far as shaping goes. I may have to tap a little more here and there to get a smooth front, but I'm thinking it looks pretty close. A close look at the border cuts on the front side seems to show that the doming process had no effect on them. 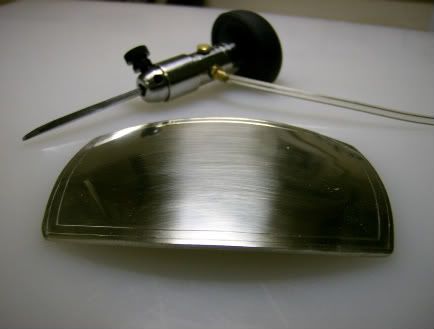 I still have to solder on the hinge and pin, clean and polish the back then sand and clean the front side well in preparation for design transfer to begin engraving the design. Back soon, in the meantime, crits or comments, questions or any advice is encouraged. Thanks, Gene |
|
#4
|
|||
|
|||
|
Last night I filed, sanded and polished the outer edge of the back side mainly to remove the shear marks left from cutting the blank from the sheet stock. I then soldered the buckle/belt hinge and the pin onto the back. I didn't have a nickle pin so I made one out of sterling. You can probably notice the color difference.
The soldering process produced quite a bit of a copper oxide looking firescale. I quenched the piece in a heated Sparex pickle solution and let it soak overnight. By this morning, most of the worst stuff was gone but I still had to go over the back with a fine arbor mounted steel brush. The front side cleaned up well and I used the same brush on the engraved border lines. They cleaned nicely also. Once again, I went over the front lightly with 1500 grit sandpaper. The buckle is now ready for part of the design transfer. I won't be able to work in the shop tomorrow due to work, but hopefully at night I can get more done on this. 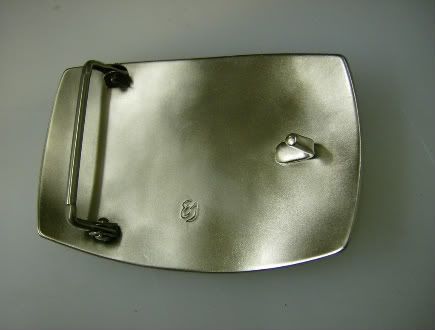 From this angle the hinge appears to be slightly off center (top to bottom), but I believe it is just the angle at which I took the photo, for the same reason the right side of the buckle appears wider than the left. |
|
#5
|
|||
|
|||
|
Today I started my design transfer. I've had trouble with a some methods, I think mainly because I do not own a laser printer. I will eventually get a laser printer and some transfer solution. In the meantime, I've decided to use a method I haven't seen or heard of used here on the forum.
Occasionally I do glass award etching, or as is referred to most commonly, 'sandcarving'. It is nothing more than sandblasting an image or lettering onto glass by use of a stencil. Since some people may not be familiar with this process, I will explain some of the highlights involved. I started my process by determining what size to make the design. Here I just printed the design in different sizes, quickly cut some of them out and laid them on the buckle to decide which size looked and fit the best, keeping in mind that I need the center diagonal space left open for the center panel. 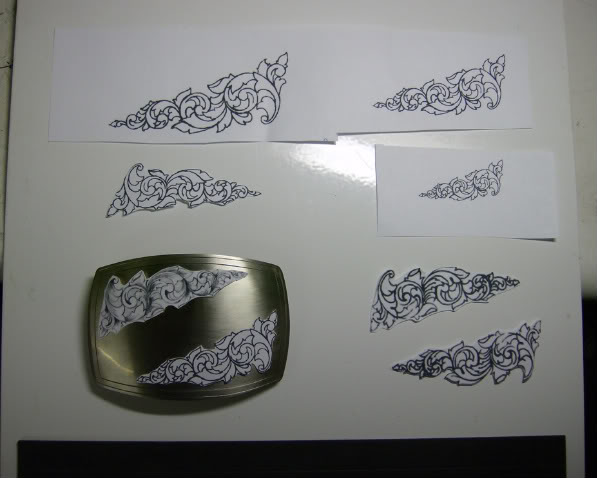 After I decide which one works best, I print the reversed image on a sheet of transparency film. This only has to be done once since I will be using the same design on the top as on the bottom. This particular printed piece was not reversed, I use it to more clearly check positioning. 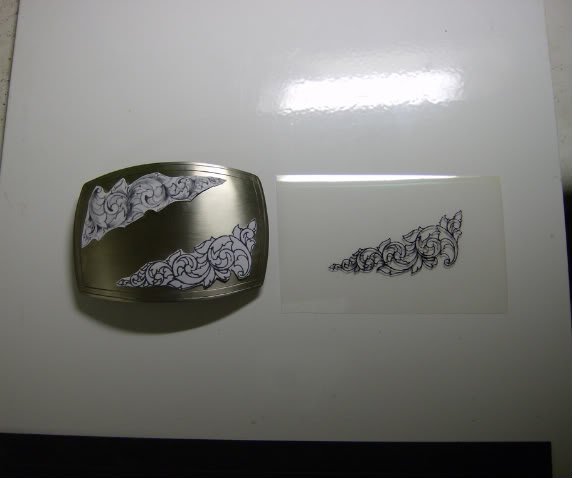 I temporarily tape the film to more clearly see position and relationships. 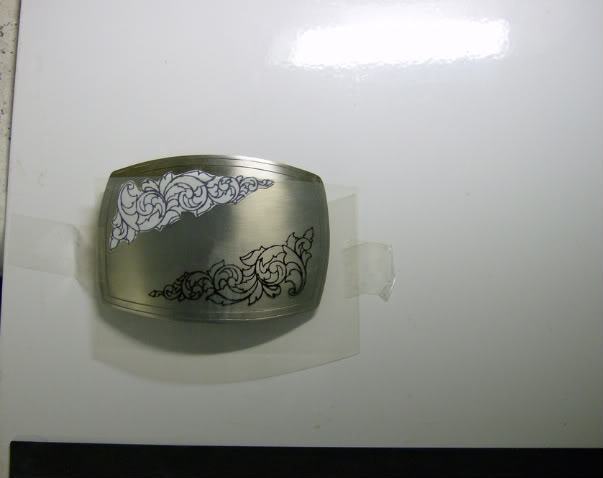 At this point I've placed the print on the transparency in contact with a piece of photo emulsion film (or photo resist) (blue) and exposed them under a ultraviolet light for 30 seconds. What that does is harden and set the emulsion except where the UV light is blocked by the black lines in the design. This step is not illustrated here, but is preformed under UV light. The blue emulsion strip has a shiny and a dull side. After exposing to UV, the strip is held onto this white metal backer dull side up with 2 srip magnets in preparation for washing out of the uncured emulsion thus exposing the design. 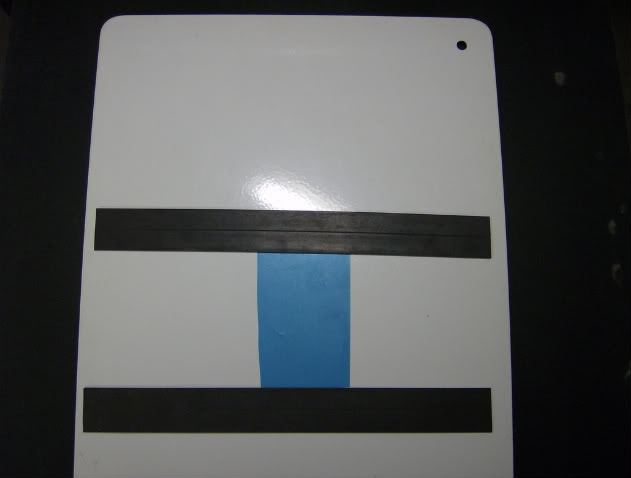 In the sink, I wash out the emulsion with a warm water spray for about 3-4 minutes. Only the uncured emulsion washes out thus creating the stencil. The shiny opposite side is what holds all this together. It is not water soluble and when the design is placed on the metal this shiny carrier will be removed. 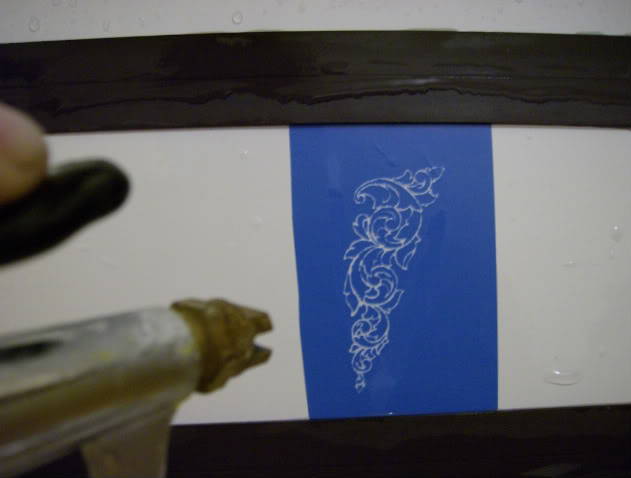 The blue emulsion strip (stencil) is laid to dry on a paper towel, again dull side up. The dull side at this stage is very soft and tacky. Now you can see that image is reversed, when it dries I will flip it over and lay it on the metal in it's proper position.  While the stencil dries, a milky adhesive is applied to the buckle. It is fast drying and will be totally dry in about 5 minutes sitting in front of a fan. It dries clear. 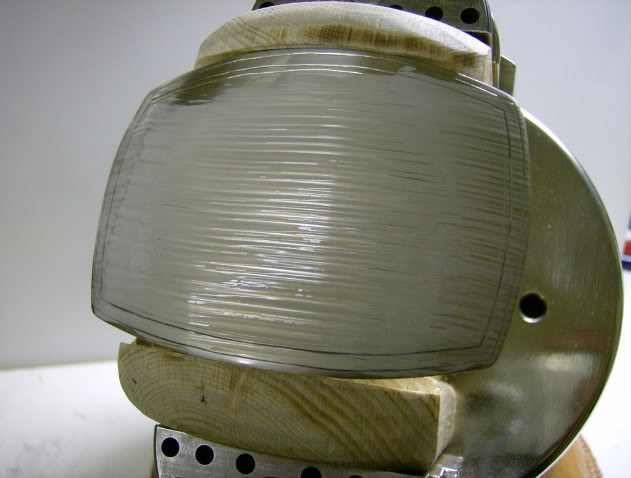 At this point I place the stencil dull side down onto the buckle. Both surfaces are very tacky so I'm being careful that it is in it's proper position. If lightly placed, I still can remove and reposition if needed before pressing into good contact. Shiny carrier backing is removed at this stage and stencil is pressed down firmly for a good adhesion. 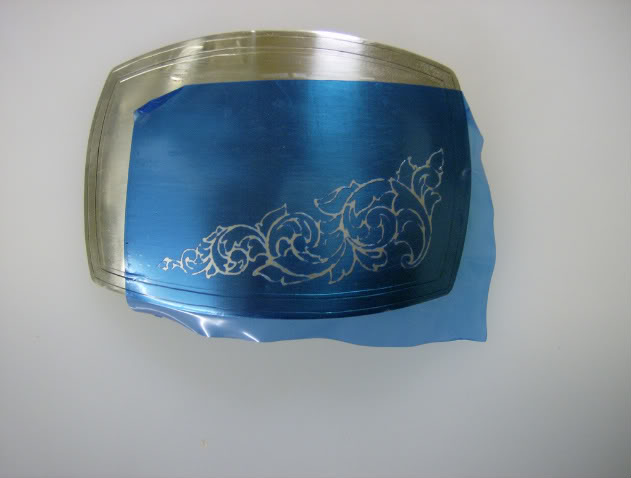 All exposed metal must be covered to prevent sandblasting what shouldn't be. 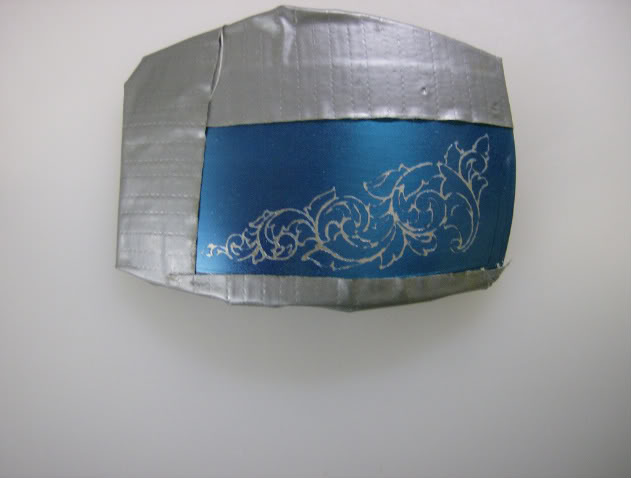 Buckle is sandblasted or very lightly air abraided (this step not illustrated here). A handheld air eraser will work fine for this step also. I used aluminum oxide but I'm sure glass beads would work also. The surface is very lightly etched, so light in fact that If I make an error at this point a light sanding would clean the surface to start over. After sandblasting, the entire piece is placed under warm running water to soften and loosen the stencil which is then simply rubbed off with my thumb. In the second photo below, I rubbed black oil paint into the etched design so that it would show up in the photo better. The beauty of this technique is that the design is there to stay. It cannot be accidentally rubbed off. Every tecnique has it's pluses or minuses, this one does too. Initially may be a little more time consuming, but gets faster the more you do it and the results are great. 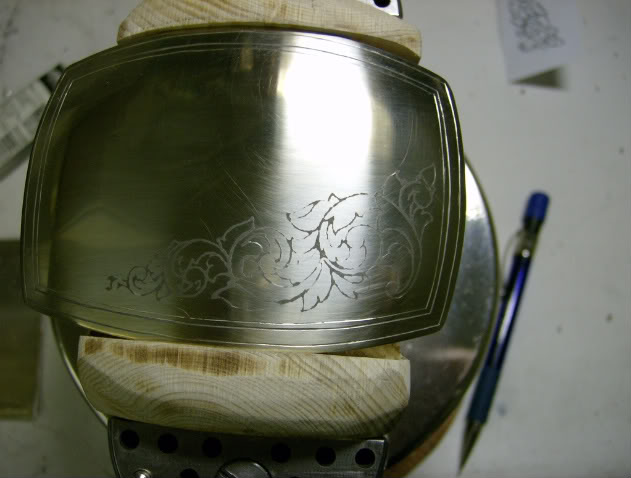 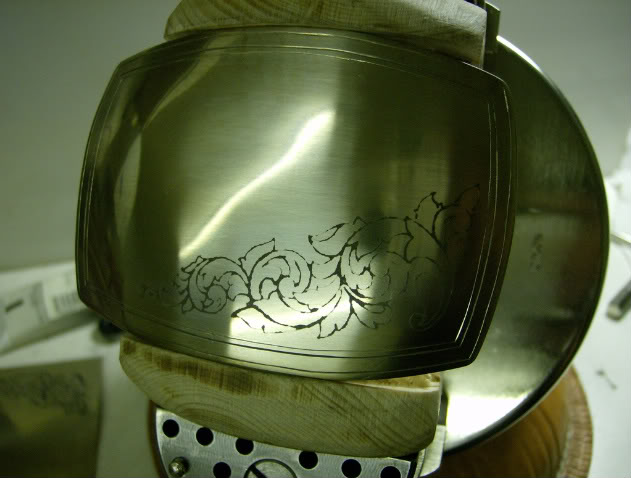 Now I can engrave this half of the buckle or I can transfer the other half next. I've got that choice since the first transfer is there to stay until engraved. I will proceed to engraving in my next posting whether or not I decide to transfer the other half. Procedure will be the same for the upper half as the lower. |
|
#6
|
|||
|
|||
|
At this time I have transfered my design to the other side/half of the buckle and I just finished engraving the main lines to the one side. I will next do the same to the other side then will start on the border pattern, leaving shading for last.
As you can see, the sanblasted design on the opposite half is still in tact and unaffected. Believe me, with my limited skills, I was all over that buckle when I engraved the one side. Had the design been transfered in a less permanent method, I know I would have wiped off most of it. I know others do this well, however, I'm not there yet. 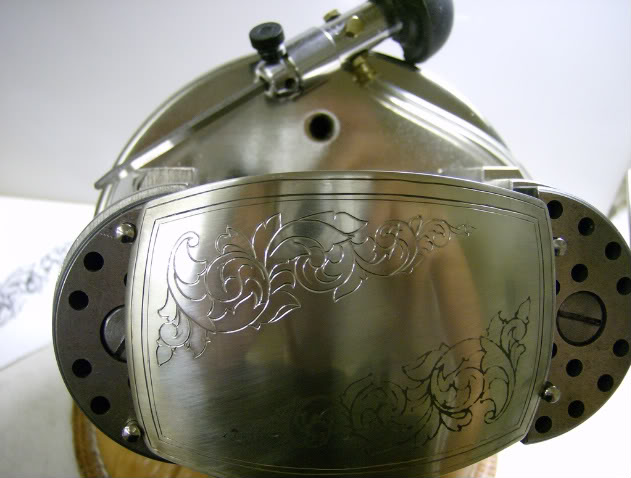 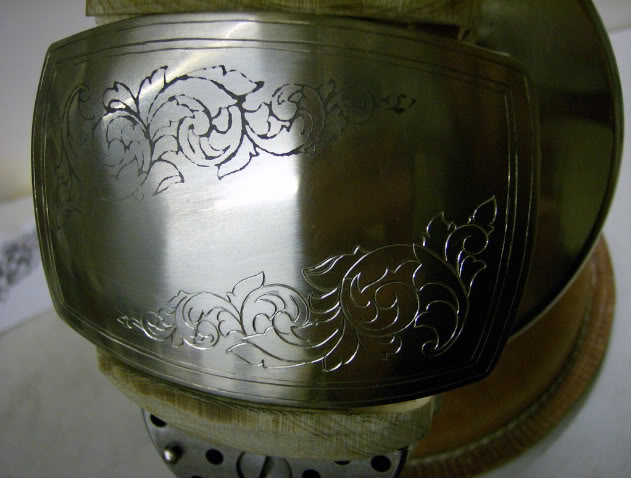
|
|
#7
|
|||
|
|||
|
I've got the main cuts done now on the other side/half. My plan now is to move on to the border pattern and come back and fill in details later. And of course deal with the center panel.
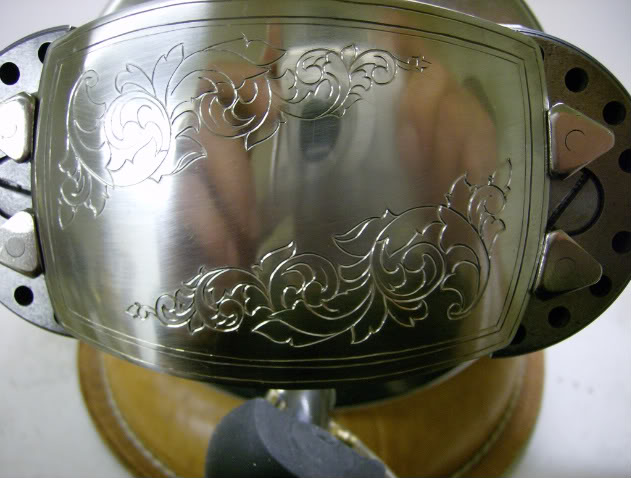 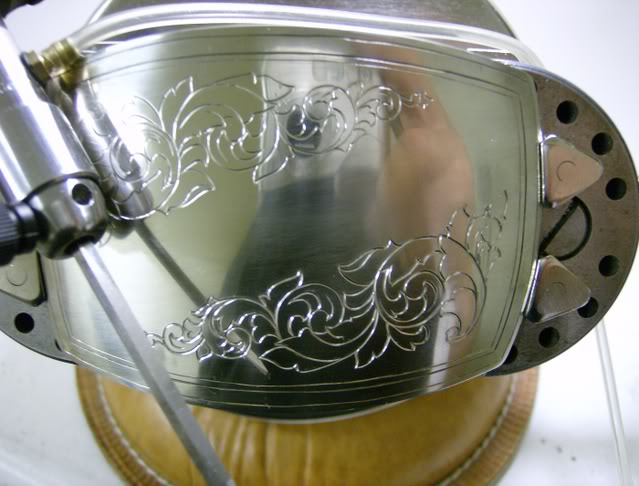
|
|
#8
|
|||
|
|||
|
Here I show how I laid out the spacing for my border pattern. Instead of measuring out each little line, I cut a narrow piece of plastic sheet to the width I wanted then just laid it against the first line and used it's opposite edge to draw the next line etc, etc. I've been having trouble with the surface of the buckle scratching easily, so I covered the center portion with clear packaging tape while I drew and cut the border pattern.
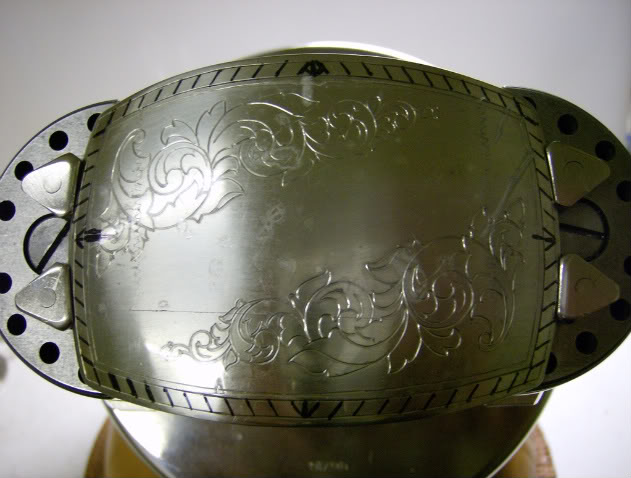 This is the buckle just after I cut the border. 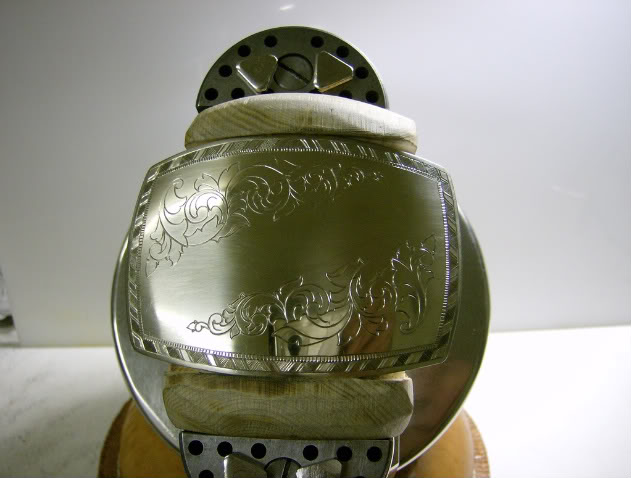 I temporarily darkened it for photo purposes and to see what it will look like finished.i 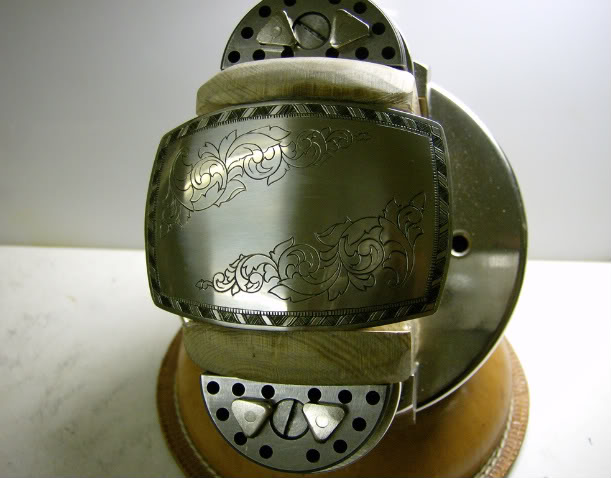
|
|
#9
|
|||
|
|||
|
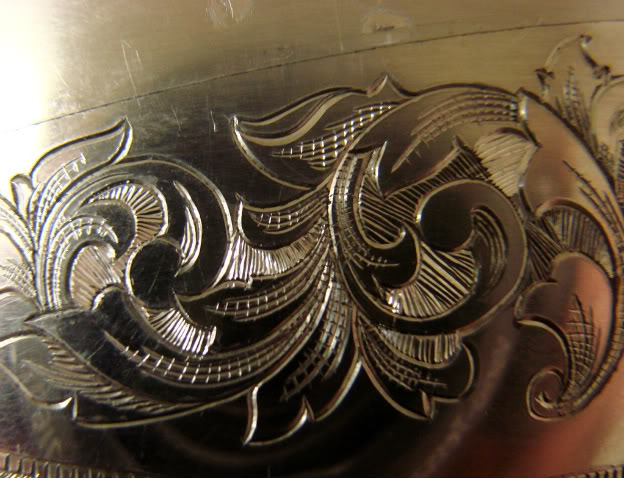
Started my shading and background removal. I increased the contrast slightly on the photo to show the cutting of the background a little better. I will next crosshatch the cuts in the background, flatten that with a flat punch then stipple.
|
|
#10
|
|||
|
|||
|
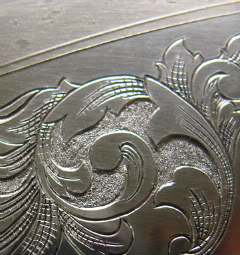
I did the crosshatching on the background, pounded that surface flat then stippled with a small pointed bur. Smaller pic is a close up showing the background of first scroll finished and awaiting blackening. Larger pic is an overall view of the buckle with the interior background removed on both elements and blackened temporarily with artist's oil paint. No other background will be removed. The next and final step is to deal with the center design.
 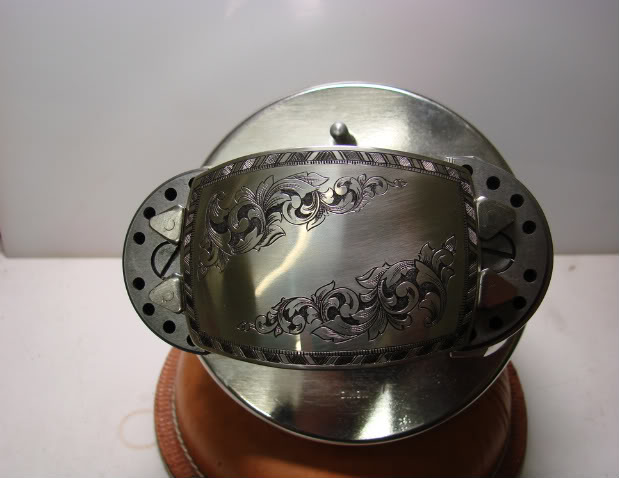
|
|
#11
|
|||
|
|||
|
I've started the center design but have decided to change it somewhat from my original drawing. Instead of the plain diagonal banner in the original drawing, I've chosen to cut the flowing banner as shown below. For this step I drew the banner directly on the buckle using a micro tipped Sharpie marker. I can't say how many times I had to erase and start over to get it somewhat evenly placed. I've also decided to include a name in the banner, an idea I wasn't sure of initially. I believe the banner in the buckle as it stands now will be a better size for the lettering than the wide one originally. Again, I've darkened this quickly and temporarily so darkened areas do not appear even at this point for that reason. I am not too satisfied with the shading on the banner now that I see it darkened so I will go back to that and add a few more shading lines here and there to increase the contast in an attempt to bring it forward more. The center portion of the banner will also have some shading but will wait till I place the lettering before I do the shading on it. This picture is not the best, I will take another later today.
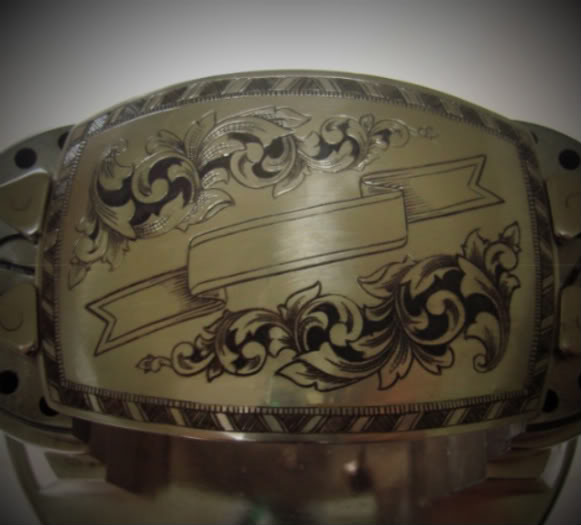
|
|
#12
|
|||
|
|||
|
Here is another view. Photo taken outdoors this time and since it was a bright day out, I moved into a semi-shaded area and took this photo using a white plastic 5 gallon bucket as a light tent. I did a little bit of crosshatching
to the shading on the banner to increase contrast. 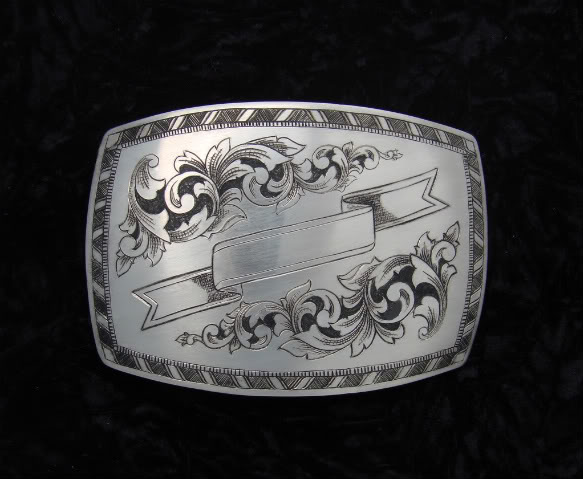
|
 |
| Bookmarks |
|
|